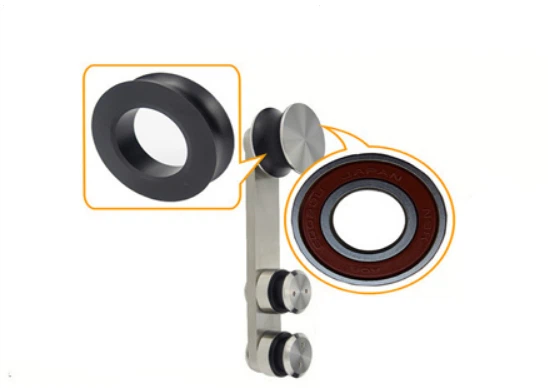
Hey there, DIY enthusiasts and barn door lovers! As a supplier of Bulk 8ft Barn Door Kits, I've seen my fair share of installation woes and triumphs. One of the most crucial steps in getting that perfect sliding barn door is leveling it during installation. Trust me, it makes a world of difference in how well your door functions and looks in the long run. So, let's dive into how you can level a Bulk 8ft Barn Door Kit like a pro.


Pre-Installation Checks
Before you even start hanging the door, you need to do some prep work. First off, check the door and the hardware kit. Make sure all the parts are there and in good condition. You don't want to be in the middle of installation and find out you're missing a crucial piece.
Next, take a good look at the wall where you'll be installing the door. It should be straight and sturdy. Use a level to check the vertical and horizontal alignment of the wall. If the wall is out of plumb, it's going to affect how level your door hangs. You might need to make some adjustments to the wall or use shims to compensate.
Installing the Tracks
The tracks are the foundation of your sliding barn door. If they're not level, the door won't slide smoothly. Start by marking the position of the tracks on the wall. Use a measuring tape to ensure the tracks are parallel to each other and the floor. A 2-foot level can be really handy here to double-check the horizontal alignment as you mark the holes for the track brackets.
Once you've marked the holes, drill them into the wall. Make sure to use the right size drill bit for the screws that come with your Exterior Sliding Door Hardware Kits. After drilling, attach the track brackets to the wall using the screws. Again, use the level to make sure the brackets are level before tightening the screws all the way.
Now, it's time to install the tracks onto the brackets. Slide the tracks into place and secure them with the provided hardware. Check the level of the tracks one last time. Even a slight tilt can cause the door to bind or not close properly. If you find any unevenness, you can use shims under the brackets to adjust the level.
Hanging the Door
With the tracks in place, it's time to hang the door. This can be a two-person job, especially with an 8ft barn door, as it can be quite heavy. Lift the door carefully and align it with the rollers on the tracks. Slowly slide the rollers onto the tracks until the door is fully supported.
Once the door is hanging, check its level. You can do this by placing a level vertically on the edge of the door. If the door is not level, you'll need to make some adjustments. Most barn door hardware kits come with adjustment screws on the rollers or the top hangers. By turning these screws, you can raise or lower one side of the door to get it level.
If you're having trouble getting the door level, double-check the level of the tracks. Sometimes, the issue might be with the tracks rather than the door itself. You might need to go back and readjust the track brackets to get everything in line.
Checking the Alignment
Leveling isn't just about the vertical and horizontal orientation of the door; it's also about its alignment with the wall and the opening. Step back and look at the door from different angles. Make sure it sits flush with the wall and that there's an even gap around the edges.
To adjust the alignment, you can use the adjustment screws on the rollers or the hinges. If the door is too close to one side of the opening, you can move the rollers slightly to create a more even gap. If the door is rubbing against the wall or the frame, you might need to loosen the screws on the brackets and reposition the tracks slightly.
Testing the Door
Once you think you've got the door level and aligned properly, it's time to test it. Slide the door back and forth a few times. Does it move smoothly? Is there any binding or resistance? If the door doesn't slide smoothly, it could be a sign that it's still not level or properly aligned.
Pay attention to how the door closes and opens. It should close all the way without any gaps or sticking. If you notice any issues, go back and make further adjustments until the door functions perfectly.
Tips and Tricks
Here are some additional tips to make the leveling process easier:
- Use a laser level: A laser level can be a game-changer when it comes to getting accurate measurements. It projects a straight line on the wall, making it easier to mark the position of the tracks and ensure they're level.
- Take your time: Don't rush the installation process. Leveling is crucial, and it's worth spending the extra time to get it right. Rushing can lead to mistakes that will be more difficult to fix later.
- Ask for help: As I mentioned earlier, installing an 8ft barn door can be a two-person job. Having an extra set of hands can make the process safer and more efficient, especially when it comes to lifting and hanging the door.
Conclusion
Leveling a Bulk 8ft Barn Door Kit during installation is a crucial step that can make or break the functionality and appearance of your door. By following these steps and tips, you can ensure that your door hangs level, slides smoothly, and looks great in your space.
If you're in the market for a Bulk 8ft Barn Door Kit or other related hardware like 7 Ft Barn Door Hardware or Outdoor Sliding Barn Door Hardware, we've got you covered. We offer high-quality products at competitive prices. If you have any questions or want to discuss your specific requirements, feel free to reach out. We're here to help you with your barn door project from start to finish.
References
- Woodworking magazines and online resources for general barn door installation techniques.
- Manufacturer's instructions that come with the Bulk 8ft Barn Door Kit for specific hardware details.